Showing posts with label jelly. Show all posts

Sunday, October 13, 2013

Nail Art-Glitter Pyramids

Hello everybody! Happy long weekend! I love long weekends so much! Anyone have fun plans? I'm getting together with my marching band buds tomorrow to work on our costumes for the Halloween parade! Should be fun. 
So today I've got some cool glittery nail art for you guys! I call them my glitter pyramids, cuz that's exactly what they are. But let me just say...that these nails look SO MUCH BETTER in person than in these pics. My camera just fails at picking up glitter. Also I think he was having a bad day :( My camera and light were just not getting along today...
Anyway this is my awesome blingy manicure for today:
See? Glitter pyramids!


So the first thing I did was pick out my base color, Zoya-Frida 
To be honest the hardest part of this mani was picking out the base color. I'm not kidding, I must have spent at least 10 minutes in front of my boxes of polish trying to find a nice color. But seriously when I picked up Frida I just about had a nailgasm cuz good Lord it was PERFECT. I honestly couldn't have found a better color for this.
Plus it's a jelly and jellies are automatically amazing. I mean, look at that shine!! And that's no topcoat! It looks like I'm wearing jello on my nails...i LOVE IT!!!
This is 3 coats, which I think is the perfect opacity for this polish. AGGHH I'M SO OBSESSED WITH THIS POLISH!!
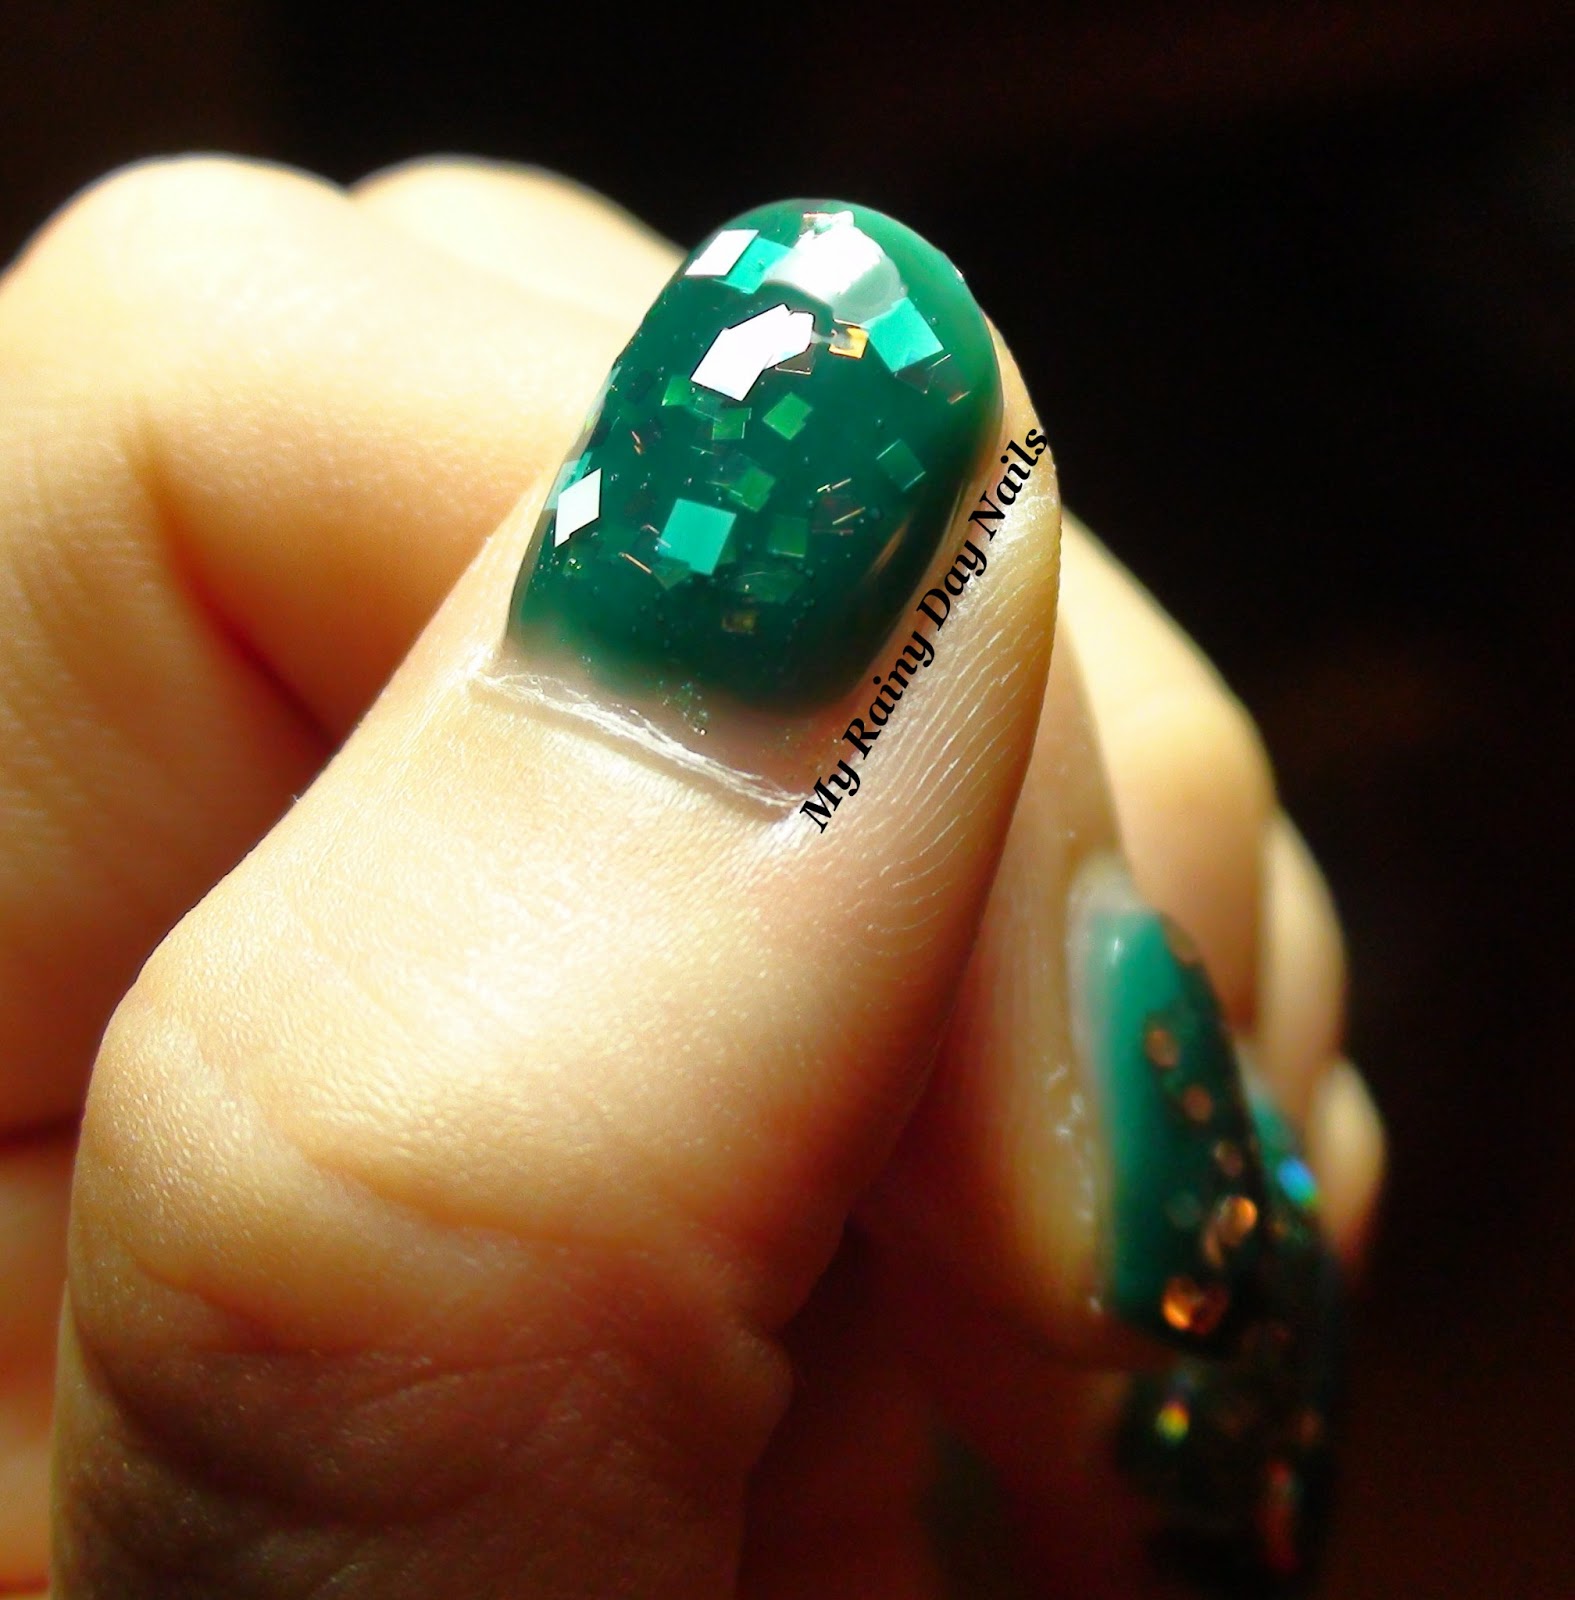
So after the base it was one thick coat of clear and then I placed the large glitter into the pyramid shape. For some reason the pinkies on both my hands are crooked, but none of the other fingers are. I'm really not sure why. 
Here's my thumb, I did a 5 across myramid on the thumb...just cuz why not
Really the glitter placement was pretty easy, working with large glitter isn't really that hard. God I love glitter placements so much! And like they always look so hard and complicated. I get so many compliments on my glitter placement manis, from like friends and parents of friends and teachers and everything. 
So I used silver holo glitter, with gold holo glitter in an upside down pyramid from the cuticle as accent nails. 

After that it was 2 nice thick generous coats of topcoat to finish it off. I really hope I don't lose any pieces of glitter, although that does tend to happen with large glitter like this. Either that or I tend to pick it off :/
So that's all the glitter I have for today! I've uh gotta get back to watching Lost cuz I watched like 5 episodes yesterday and it was amazing and I think I'm officially addicted now. Damn there goes my entire social life. 
Anyway thanks for reading guys and hope you all enjoy your Monday off!
~Nova


Friday, August 23, 2013

Deborah Lippmann-Cleopatra In New York

Hi everyone! Happy Friday, I'm going bowling tonight to raise money for our marching band trip, can't wait! I'm probably the worst bowler you've ever seen but hey, it's worth it! Lol last time I went bowling I completely broke my thumb nail...hope that doesn't happen this time :-/
Today's polish is a great one, I picked it up around Christmas time, Deborah Lippmann-Cleopatra In New York. I absolutely love this polish! It is so pretty and unique(I don't have any like it in my collection) and I love the name of it too...God it's awesome!
Cleopatra In New York is an awesome black jelly/crelly base with small and medium sized gold glitter mixed in. The base isn't so thick that it covers the glitter in the previous layers, so this polish has really great depth to it.
The formula on it is all right, the black base is a little sheer, and I'm wearing 3 coats here for full opacity. The glitter is abundant and easy to get onto the brush/nail, but I would give the bottle a nice shake first. I also added a little polish thinner to it to ease the application. A little bit of dabbing is needed for the glitter, but it's really not too bad at all. Here's a closeup: can you see how the glitter from the previous layers shows through but it slightly covered, I love how much depth this gives the polish!
Anyway, this polish is kinda special to me because it's actually the most expensive bottle of polish in my collection, at $19. I have this thing where I refuse to spend more than $20 on a bottle of nail polish, because that's just obnoxious, but you know...how could I resist this 19 dollar nail polish?!
So yeah, that's all I've got for today. Thanks for reading everyone and I'll see you tomorrow! Byee
~Nova

Wednesday, July 3, 2013

Jordana-Pink Lilac

Hello friends and aliens from afar! I hope everyone's been having a good week so far. I know I have! My parents are finally letting me sleep past 11 and it's pretty awesome! Usually they're waking me up at like 9 going "get up already it's late!!!!!" I've been catching up on lot's of TV shows, Angel, Buffy, and I get a chance to start Battlestar Galactica, which I've been wanting to watch for a really long time! God I'm nerdy.
Today's polish is one I picked up from my local drugstore, because it was super cheap, Jordana-Pink Lilac. I don't love Jordana polishes because the formulas tend to be icky, but they are very inexpensive, and I didn't have a color quite like Pink Lilac in my collection yet.
Pink Lilac is a nice pink/salmon polish. I actually really like salmon colors, which is probably why I bought it. I also chose to get Pink Lilac because it looked like it had sort of a jelly finish, and I love jellies.This is a little opaque for a jelly, it's sort of like a half jelly finish, but I really like it!
The formula is very interesting on this. On the first coat it was REAAALLLLLLYY sheer and I wanted to cry because I thought it would take like 50 coats to get it opaque. But the thing is, this polish BUILDS really nicely! So on the first coat there was like barely any color on the nail, but when I put on the second coat it was like BAM basically opaque! I only needed 3 coats in total to get it to my preference of opacity! How cool is that?!
Overall I'm actually quite happy with this color. I don't love pink, but this color isn't so bad! It's kinda muted, it's not like an in-your-face pink. I can see myself using this on Valentine's Day and stuff.
Jordana polishes retail for like $1.99 in drug stores. It may be different in different places, but basically they're really cheap.
That's all I have for today thanks for reading everyone!

Monday, June 10, 2013

"Sunday" Nail Art-Jelly Sandwiches with Zoya Frida!

Hi guys sorry I didn't have nay nail art yesterday! I was too busy planning my stupid FRENCH ORALS which I did today, plus my dad kept nagging about my math grade and how I should do extra math problems. Sigh...
So today I needed to something simple, no talent really required, so today's nail "art" is more of an experiment, my first try at the JELLY SANDWICH!! I've read/seen so many pics of these, but have never tried one. If you don't know what a jelly sandwich is, it's when you take a jelly polish (which is a kinda sheer/jelly lookin polish) and apply a couple coats to your nail, then apply a coat(s) of glitter, another coat(s) of the jelly polish on top of the glitter, and then another coat of glitter on top (optional). Due to the sheer nature of the jelly polish, the first coat of glitter will show through the polish and give the effect that the glitter is "sandwiched" between the layers of the jelly polish. At least, that's what it's supposed to look like :P
The jelly polish that I used for today's manicure (and the only jelly that I own:( ) is Zoya-Frida which is s pretty tealy blue green jelly polish. The formula on this is like a jelly, which is different from that of a regular creme finish polish. It's runnier and more watery, and is meant to be really sheer so you can apply multiple coats and darken the color. This was my first time working with a jelly, so I was new to this whole thing, but I didn't really have any problems applying Frida. I used thin coats and tried not to glob it on too much, which I usually do, and I was fine. This also tried pretty quickly, which is good because you have to keep going back and doing many coats. 
I experimented with all sorts of different glitters on a different finger of both my hands. So the nails on my left and right hand are different. God it bugs me so much!
Anyway on my right hand (from pinkie to thumb) I have:
-Models Own-Dancing Queen
-Color Club-Platinum Record
-Kleancolor-Firework
-Models Own-Ibiza Mix
-China Glaze-Whirled Away
These nails all have 3(!) coats of basecoat, 2 coats of Frida, one coat of the glitter, another 2 coats of Frida, one coat of the same glitter, and 2 coats of top coat. I used a sh*tload of base coat because a) I normally use a strengthening base coat and an adhesive one, and I've heard that tinted base coats are good for sheer polishes, so I used a tinted base coat in addition to my other 2, and b) I REALLY didn't want my nails to be all blue green stained!

Let me also just say that these were a real pain in the ass to photograph...
Here's an uber close up of my right hand ring finger (Platinum Record) so you can see the "sandwich" effect better:
You can also see how the light sorta shines through the nail near the tip because the polish isn't totally opaque. I think it looks cool.
This is my left hand. Glitter polishes from pinkie to thumb are:
-Wet N' Wild-Kaleidoscope (fine holographic glitter) + OPI-The Living Daylights (larger hex glitter)
-Deborah Lippmann-Happy Birthday
-Brand from China that's called Lucidarling (fine gold glitter) + Sephora by     OPI Tinsel Me Silver (bar glitter)
-Lucidarling (large gold glitter)
-OPI-Lights of Emerald City
I think in general I like the larger glitter better, it just gives off a better sandwich effect, while the fine glitter doesn't. I also probably should have used thinner, less glitter dense coats, so you could see the glitter underneath better. Like if you look at my ring finger it's sort of hard to see the "underlayer" of Happy Birthday.
My favorite fingers out of the whole manicure are my right pinky (Dancing Queen), my right ring finger (Platinum Record), my right index finger (Ibiza Mix), and my left index finger (Large gold glitter)

So that's it for today! Hope you're all satisfied (cough cough my blonde friend) because I took all afternoon doing these instead of studying for finals. So if I fail it's YOUR fault. jk...
Overall I really like the jelly sandwich effect and I think I'll try it again some time, and do it better! 
Zoya polishes cost $8 online, and the other glitters all cost various amounts. If you have any questions about the price you can leave them in the comments!
Whew this was a long post! Thanks for reading guys and enjoy the rest of your week!
Oh and uh...just cuz:

teehee :)

Monday, June 3, 2013

Urban Outfitters-Pluto

Hi everyone happy Monday! Today's polish is a pretty glitter, Urban Outfitters-Pluto. My town recently got an Urban Outfitters in down town, and since the only thing I can afford in that store is the nail polish, I've recently acquired several of their polishes! Pluto is a beautiful navy/purple-y jelly base (I LOVE navy!!) with super pretty iridescent glitter. I think this is a really unique color/polish in general, so kudos to Urban for doing something so original!
In the bottle the base looks darker and more blue, but on the nail there is definitely some purple in there. And look at that amazing glitter sparkle! These pictures all have a coat of Seche Vite on top to smooth out the glitter. 

Here's a close-up of my finger. I love how the pretty jelly base sort of hides the glitter from the previous coats. And the top glitter is so much sparklier in real life it's just like outer space BAM on my nails!
Now let's talk formula. Just from looking at this polish you can expect the polish to be pretty goopy, but I had no idea just how bad it would be. When I first started painting I had no idea how goopy it would be and stupidly plopped a giant thick drop onto my pinkie. That was a HUGE mistake! The polish sort of runs around depending on how you're tilting your hand. It was a pain. My advice with this polish is to apply several VERY thin coats. It's also a good idea to let the previous coat dry before applying the next coat, or else the polish will sort of drag off and be all patchy. My pinkie has 2 gloppy lumpy coats, and the other fingers all have 3 thinner coats. It definitely is easier to manage with 3 coats, and I think it's totally worth it seeing as the color is so gorgeous! 
This polish cost $5 at Urban Outfitters, but they have a 2 for $8 sale, so I think I got this for $4 with another polish.
That's it for today see you all next time!