Showing posts with label sephora by OPI. Show all posts

Thursday, September 5, 2013

Double Post-Mermaid Style Nails

Hello everyone! Whew I'm back from that long break I took. So yeah I had sleepaway band camp and stuff...God band camp is literally NON STOP work! We have to learn drill and music and be good so our band instructor won't yell at us. But you know it's actually a lot of fun...we slept in cabins with our friends and had theme days like purple day and superhero day and we had a talent show and it was awesome! Ok that was 5 days, so then after that we had Labor day weekend which I spent with some family, and I went SHOPPING which was fun, as always. Then SCHOOL started again. I got to meet all my teachers and stuff...I'm loading up on honors courses so I'm probs gonna be like super busy during the year :( so yeah I've been busy lately...But it's a long 4 day weekend so it's back to posting! 
Today's I've got another fun double post for you guys with my good friend Carlee. If you missed our last double post you can see it here
Today's theme was mermaid inspired. Carlee is sporting this lovely polish:
"Hi blog readers! So this is Carlee and this polish is Sephora By OPI-Mermaid To Order. This polish is an aqua blue/teal color with a shiny metallic finish. It's a little frosty and you can see some streaks and brush strokes but it doesn't take away from the appearance. 
This is with only one coat plus a quick dry top coat, but another coat of polish could be used for touch ups or if you have larger nails. This polish goes on very easily, it's pretty thin but still thick enough for only needing one coat for opacity. 
This polish is also a little different depending on the lighting, it can look more green or blue, and these pics are making it look a little more blue than it really is. 
I love this polish and it's probably the favorite polish I have ever used, I am just IN LOVE with it! I think this is a serious must have for everyone's collection, I mean, it practically glows. So these sell for about $9 a bottle, but I got mine in a special gift box that came with other polishes, I don't remember what it was called...
That's all I've got for today thanks for reading my post everybody!"
Ok so to go along with Carlee's nails I thought I would just pull out one of my metallic teals and swatch it, but then I thought geez that would be so boring. I was thinking about some nail art to do to match Mermaid To Order and then it was like hey, it's got mermaid in the name, it's time for Mermaid Nails!! Yayy!
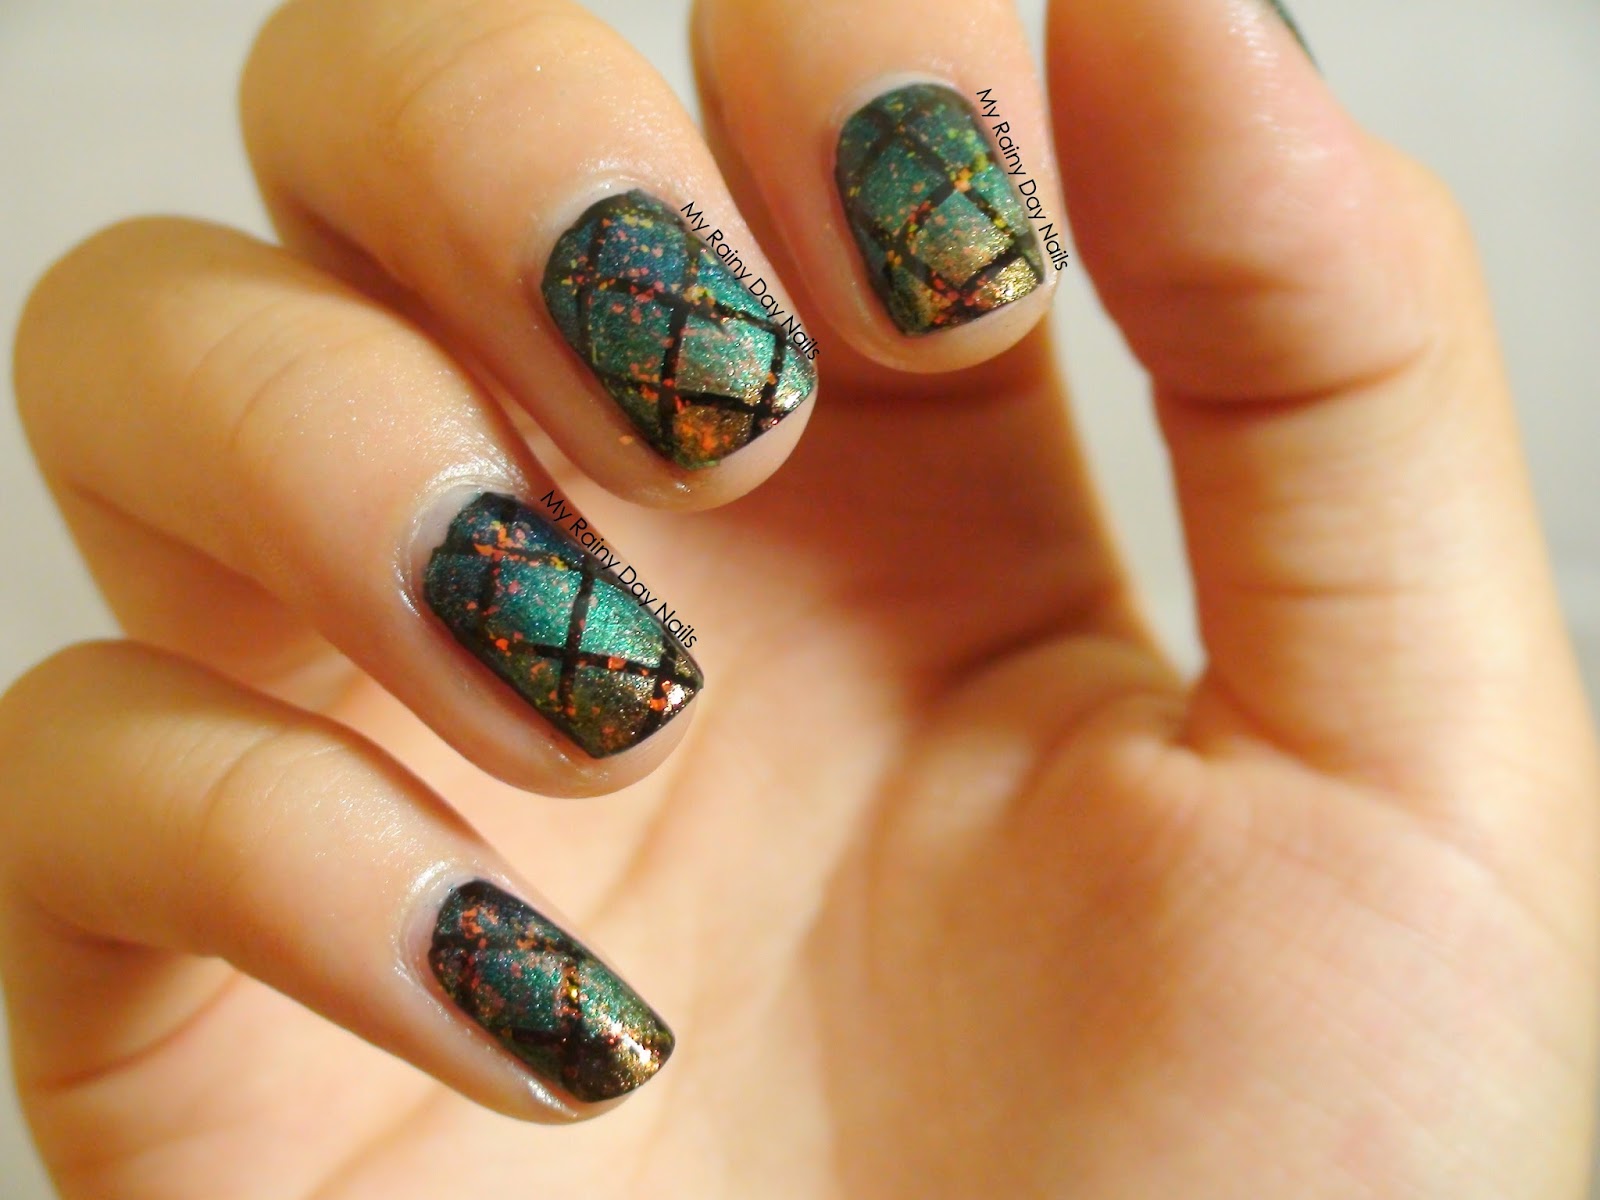
So these are the mermaid nails I came up with. Whenever I think about mermaids I think about colors like gold and metallic greens and blues, like the polish above. And I also think of this:
http://norribeth.webs.com/photos/Take-a-splash/08_hp-mermaid.jpg
Yeah I know I'm a nerd. Most people think of like the little mermaid and Ariel and stuff right...?
http://images.fanpop.com/images/image_uploads/Ariel---Flounder-the-little-mermaid-223085_1280_1024.jpg
But whenever I think of Ariel I think of this:
http://i598.photobucket.com/albums/tt66/beth_soprano/Daily_Firefly/May25ariel.jpg
Two by two hands of blue...
https://blogger.googleusercontent.com/img/b/R29vZ2xl/AVvXsEgIOa1rZz-jWF2kANnHsN1Y4sQQW_MnFOGasWHWllOSFUlci_RBDrSsNhfGcx2h1GWi3kesXb801ZLkFZw49PjLjnmt30rLH31ywcVfqFyuhj-vGM-Bsha1V63TcJukmbau5w8WlqIzNCmv/s320/firefly_8_ariel.jpg
Ok sorry about my tangent...For those of who get this I bet you all agree with me. and for those of you who are looking at me like wtf yeah...sorry.
Ok so back to nails.

 I started with my lovely black base, then used striping tape to block off the fishnet pattern. I painted rows of Sally Hansen Lustre Shine-Plume(the gold), Wet N' Wild-Caribbean Frost(greenish teal), and an unnamed metallic blue polish onto a make up sponge and dabbed the gradient onto the nail. I remove the striping tape and voila. My mermaid mani is complete. almost
Just to add a little extra dimension and color, I painted a veeery thin coat of Essie-Shine Of The Times, a multidimensional iridescent flakie topcoat to give it a little more mermaid-ness.
 So this was the final result. These nails were actually very easy, I should do some more striping tape gradients in the future. I always love working with striping tape. It's fun.
Ok that was actually a pretty long post, thanks for reading guys!
And here's a pic of my band camp cabin:
Yeah it was purple day.
That's our entire band lol. I feel really nerdy now. This whole post was sorta nerd filled. And also yes, it was still purple day. 
Hooray for nerds, we're the coolest
~Nova

Monday, June 10, 2013

"Sunday" Nail Art-Jelly Sandwiches with Zoya Frida!

Hi guys sorry I didn't have nay nail art yesterday! I was too busy planning my stupid FRENCH ORALS which I did today, plus my dad kept nagging about my math grade and how I should do extra math problems. Sigh...
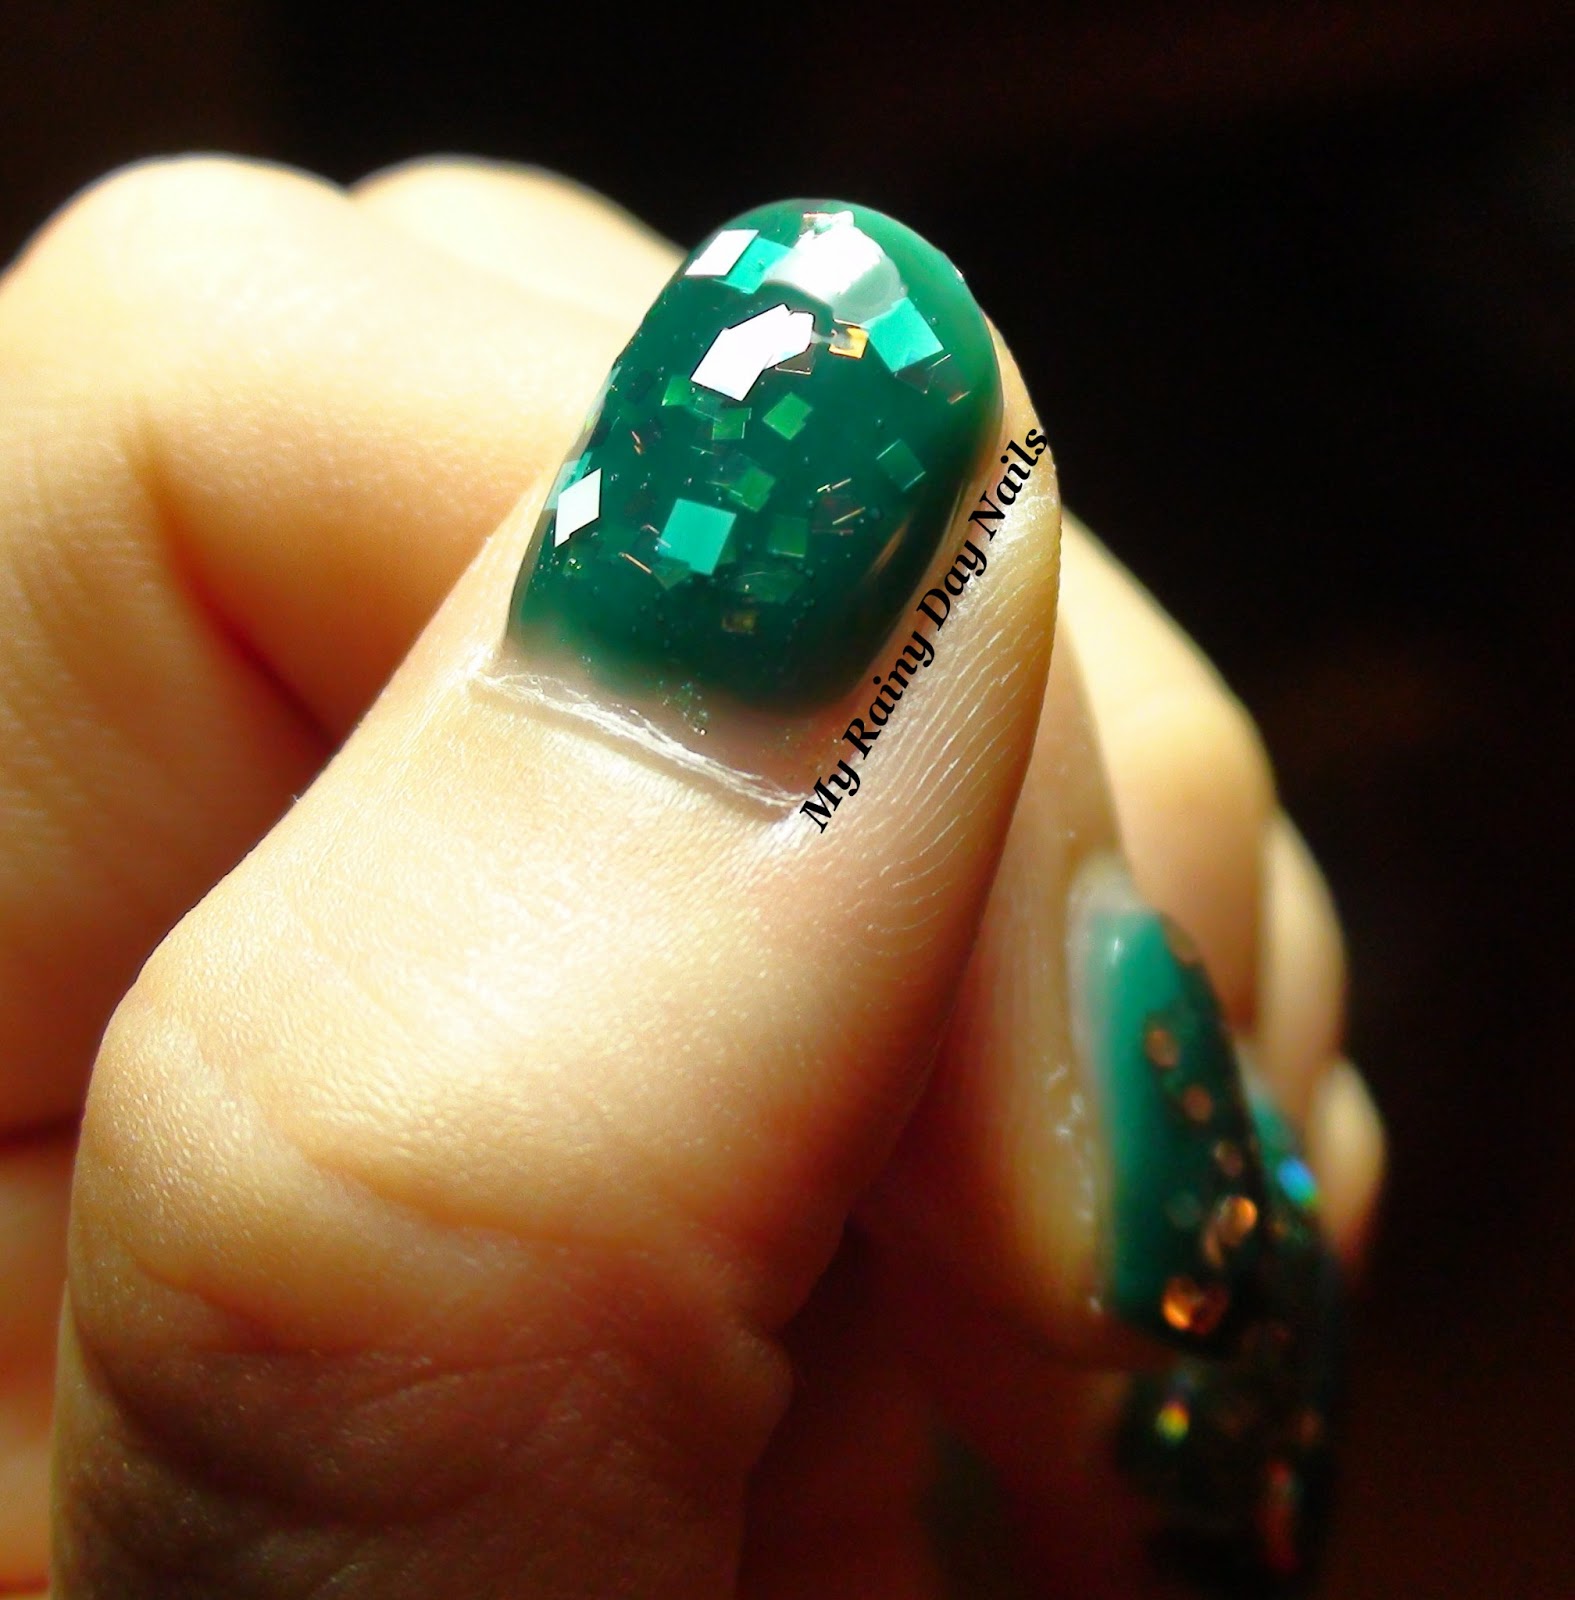
So today I needed to something simple, no talent really required, so today's nail "art" is more of an experiment, my first try at the JELLY SANDWICH!! I've read/seen so many pics of these, but have never tried one. If you don't know what a jelly sandwich is, it's when you take a jelly polish (which is a kinda sheer/jelly lookin polish) and apply a couple coats to your nail, then apply a coat(s) of glitter, another coat(s) of the jelly polish on top of the glitter, and then another coat of glitter on top (optional). Due to the sheer nature of the jelly polish, the first coat of glitter will show through the polish and give the effect that the glitter is "sandwiched" between the layers of the jelly polish. At least, that's what it's supposed to look like :P
The jelly polish that I used for today's manicure (and the only jelly that I own:( ) is Zoya-Frida which is s pretty tealy blue green jelly polish. The formula on this is like a jelly, which is different from that of a regular creme finish polish. It's runnier and more watery, and is meant to be really sheer so you can apply multiple coats and darken the color. This was my first time working with a jelly, so I was new to this whole thing, but I didn't really have any problems applying Frida. I used thin coats and tried not to glob it on too much, which I usually do, and I was fine. This also tried pretty quickly, which is good because you have to keep going back and doing many coats. 
I experimented with all sorts of different glitters on a different finger of both my hands. So the nails on my left and right hand are different. God it bugs me so much!
Anyway on my right hand (from pinkie to thumb) I have:
-Models Own-Dancing Queen
-Color Club-Platinum Record
-Kleancolor-Firework
-Models Own-Ibiza Mix
-China Glaze-Whirled Away
These nails all have 3(!) coats of basecoat, 2 coats of Frida, one coat of the glitter, another 2 coats of Frida, one coat of the same glitter, and 2 coats of top coat. I used a sh*tload of base coat because a) I normally use a strengthening base coat and an adhesive one, and I've heard that tinted base coats are good for sheer polishes, so I used a tinted base coat in addition to my other 2, and b) I REALLY didn't want my nails to be all blue green stained!

Let me also just say that these were a real pain in the ass to photograph...
Here's an uber close up of my right hand ring finger (Platinum Record) so you can see the "sandwich" effect better:
You can also see how the light sorta shines through the nail near the tip because the polish isn't totally opaque. I think it looks cool.
This is my left hand. Glitter polishes from pinkie to thumb are:
-Wet N' Wild-Kaleidoscope (fine holographic glitter) + OPI-The Living Daylights (larger hex glitter)
-Deborah Lippmann-Happy Birthday
-Brand from China that's called Lucidarling (fine gold glitter) + Sephora by     OPI Tinsel Me Silver (bar glitter)
-Lucidarling (large gold glitter)
-OPI-Lights of Emerald City
I think in general I like the larger glitter better, it just gives off a better sandwich effect, while the fine glitter doesn't. I also probably should have used thinner, less glitter dense coats, so you could see the glitter underneath better. Like if you look at my ring finger it's sort of hard to see the "underlayer" of Happy Birthday.
My favorite fingers out of the whole manicure are my right pinky (Dancing Queen), my right ring finger (Platinum Record), my right index finger (Ibiza Mix), and my left index finger (Large gold glitter)

So that's it for today! Hope you're all satisfied (cough cough my blonde friend) because I took all afternoon doing these instead of studying for finals. So if I fail it's YOUR fault. jk...
Overall I really like the jelly sandwich effect and I think I'll try it again some time, and do it better! 
Zoya polishes cost $8 online, and the other glitters all cost various amounts. If you have any questions about the price you can leave them in the comments!
Whew this was a long post! Thanks for reading guys and enjoy the rest of your week!
Oh and uh...just cuz:

teehee :)